A Simple Pour-Over Coffee Routine for Slow Mornings
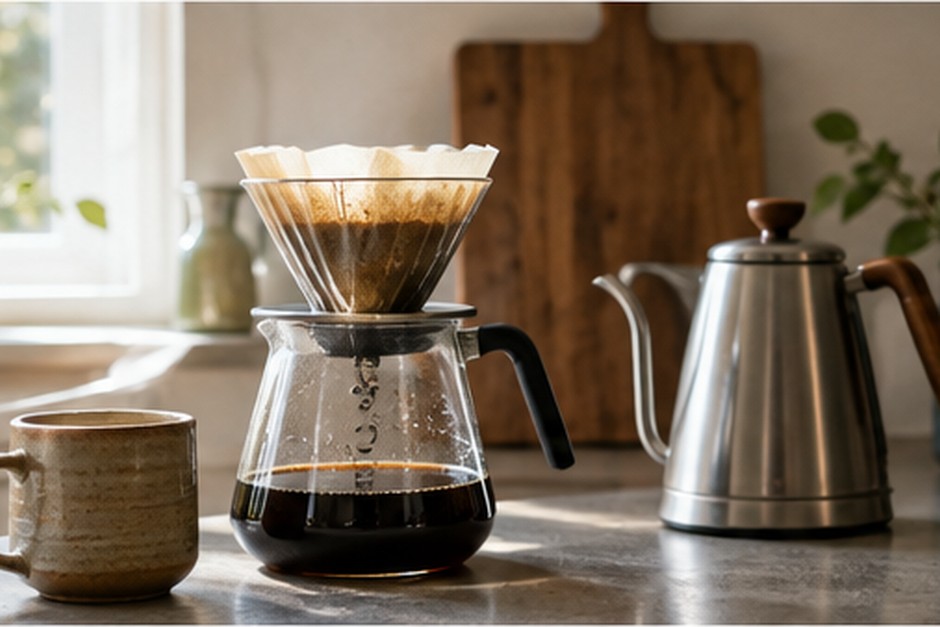
Pour-over coffee has a reputation for requiring specialist knowledge, but the everyday version can be pleasantly straightforward. You need a dripper, a paper or reusable filter, ground coffee, hot water, and a cup or carafe. A scale is helpful because it makes the process repeatable, but the aim is not to turn breakfast into a laboratory experiment.
The most useful routine is one you can remember before you are fully awake. Keep the numbers simple, use the same mug or server each day, and adjust only one thing at a time when the cup tastes different from what you want.
A dependable starting ratio
For one generous cup, try 20 grams of coffee with 320 grams of water. That is a ratio of 1:16 and sits comfortably in the middle of many common brewing approaches. If you prefer a stronger cup, use a little less water; if you prefer something lighter, add a little more.
Water temperature does not need to be exact to the degree. Freshly boiled water rested for roughly half a minute is suitable for many medium roasts. Very dark coffee can taste smoother with slightly cooler water, while lighter roasts often respond well to water closer to boiling.
Set the grind before chasing technique
For a typical cone or flat-bottom dripper, begin with a medium grind, somewhere between table salt and coarse sand. If the water races through and the coffee tastes thin, grind a little finer next time. If it drains very slowly and tastes harsh or drying, try a slightly coarser setting.
This one adjustment solves more problems than complicated pouring patterns. Make small changes and keep the coffee dose and water quantity the same while you test.
The first pour: wet everything
Place the filter in the dripper and rinse it with hot water if you are using paper. This removes papery flavours and warms the brewer. Add the coffee, level the bed with a gentle shake, then pour about 50 to 60 grams of water over the grounds.
Wait around 30 to 45 seconds. This short pause, often called the bloom, lets trapped gas escape and helps the later pours move more evenly through the coffee. You do not need to stir aggressively; a small swirl of the brewer is enough if dry pockets remain.
Pour steadily rather than dramatically
Continue adding water in two or three calm pours. Keep the stream controlled and move in small circles, mainly over the coffee bed rather than onto the filter paper. Let the water level drop a little between pours, but do not wait for the grounds to become completely dry.
The entire brew often finishes in roughly two and a half to four minutes, depending on the dripper, dose, and grind. Treat that range as a reference, not a pass-or-fail target. Taste is more useful than the stopwatch.
Use the cup to guide tomorrow’s brew
If the coffee tastes sharp, hollow, or sour, the water may have passed through too quickly. A slightly finer grind can increase extraction. If the cup is bitter, rough, or unusually drying, a coarser grind may help. When the coffee tastes balanced but simply too strong or weak, change the coffee-to-water ratio instead.
Write down a successful combination once you find it. A small note such as “20 g coffee, 320 g water, grinder setting 14” prevents you from rediscovering the same recipe every morning.
Make the routine pleasant
Keep the equipment together if you have the space: dripper, filters, scoop, and beans in one cupboard or tray. Fill the kettle before you begin anything else. While the water heats, grind the coffee and rinse the filter. This sequence naturally fills the waiting time and turns the process into a short, unhurried ritual.
There is no need to pursue perfect symmetry in every pour. Consistency comes from repeating a few sensible choices. When the method is simple enough to do without checking instructions, pour-over coffee becomes less about technique and more about enjoying a quiet five minutes at the start of the day.